Gate Automation Blog
I recently fitted an electric gate in our house to make sure the children are safe. I also wanted to find
an affordable way to install an electric gate in our home.
The only issue was the gate can be only controlled by an infrared remote.
Given I am a software engineer, I thought I surely could improve that. So I did a bit of research and I discovered that I can fit a relay to the gate motherboard.
And so the fun began. It started as a simple app to open and close the gate but then I love automation so that much I added cabablity to schedule the opening and closing of the gate. Then it evolved to add an IP camera pointing to the gate that I can connect to it and see the gate live from the app.
So here is a short summary of the development journey.
The Schedule Screen is made to set a schedule for the gate with a specific function e.g. open the gate every day at 8 O'clock in the morning.
There are few options when adding a schedule to select:
Given I am a software engineer, I thought I surely could improve that. So I did a bit of research and I discovered that I can fit a relay to the gate motherboard.
And so the fun began. It started as a simple app to open and close the gate but then I love automation so that much I added cabablity to schedule the opening and closing of the gate. Then it evolved to add an IP camera pointing to the gate that I can connect to it and see the gate live from the app.
So here is a short summary of the development journey.
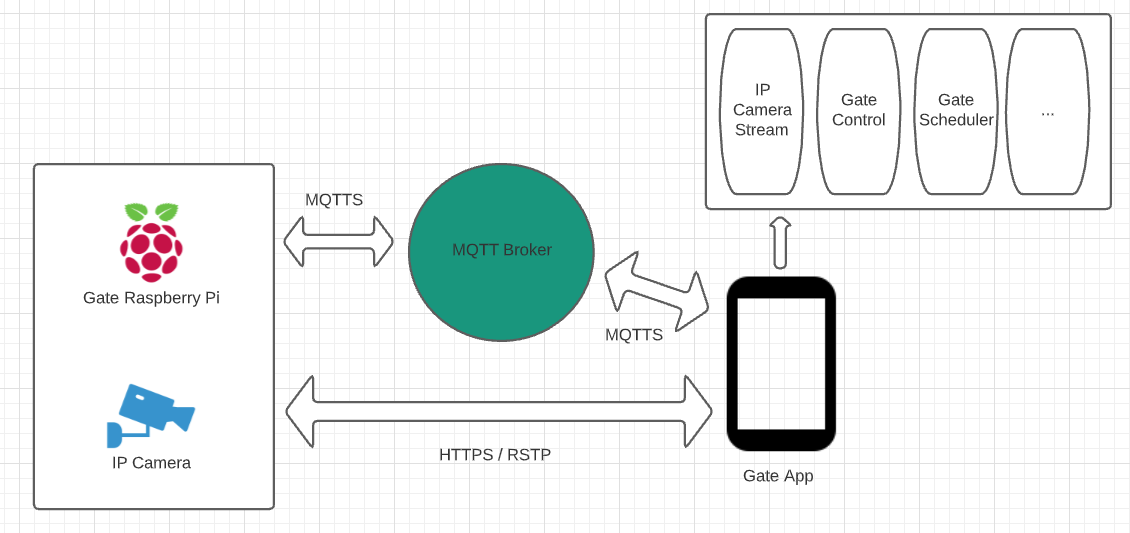
Components
- Raspberry Pi
- Raspberry Pi Relay Board
- IP Camera
- MQTT Broker
- Android Phone or an iPhone
Design
Application
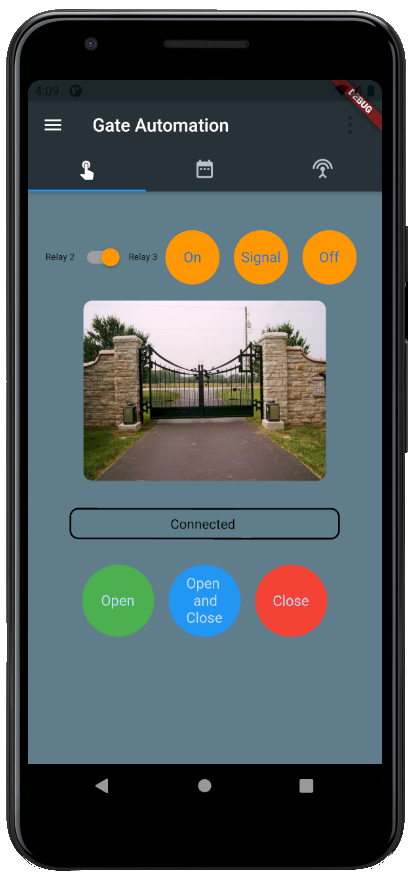
The main screen is made of multiple parts:
- Gate functions:
- Open Hold the gate open
- Open and Close Open the gate for two minutes and closes it automatically afterwards.
- Close Closes the gate
- MQTT Connection Status
- Gate Camera View
- Other functions The relay board I am using is made of three channels, one used for the gate, and I have two spare channels that can be used for different purpose like light automation.
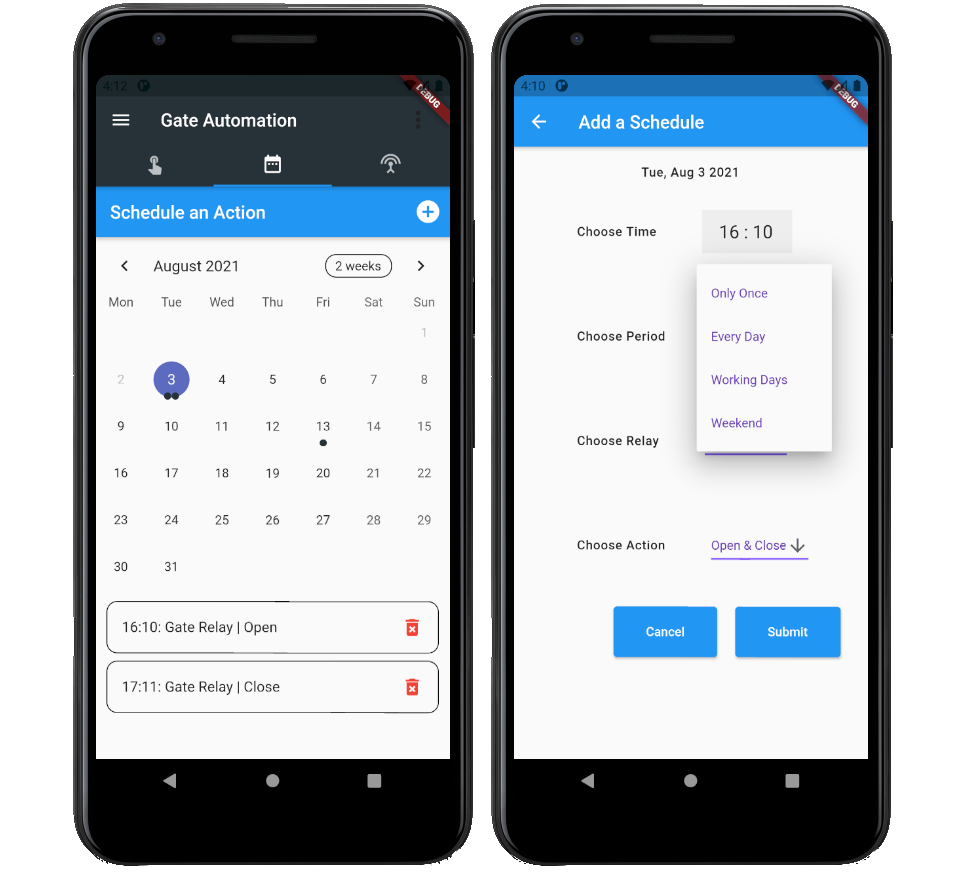
The Schedule Screen is made to set a schedule for the gate with a specific function e.g. open the gate every day at 8 O'clock in the morning.
There are few options when adding a schedule to select:
- Choose the time
- Choose the period Trigger Only once, every day, week days or weekend
- Choose the relay Gate, Relay 2 or Relay 3
- Choose the action Open, Close, Open&Close, On, Off or Signal.
Development
The development process involved four different parts:- A Gate Program The program was developed in python, resides on a Raspberry Pi, acts as MQTT client that connects to the broker and subscribes to the gate topic. Also handles scheduling the events using cron jobs.
- MQTT Broker Setting up MQTT Broker using docker container with bash scripts to configure the SSL certificates, the MQTTS network port and the authentication part.
- IP Camera Setting up an IP camera pointing to the gate and setting up the firewall rules for port forwarding in order to establish a conection with the camera.
- Phone Application The application was developed with flutter to support Multi-Platform. The application acts as MQTT client that publishes messages into the broker and connects to the security camera.
Improvments
As this still in working progress, I am planning on implementing the below in the near future:- Pairing capabilities e.g. Set up the gate internet connection and other settings via the app
- Integrate with Google Assistant, Alexa and Siri to control the gate via voice command
- Integrate with Nest Hello Doorbell by Google and Ring Video Doorbell by Amazon